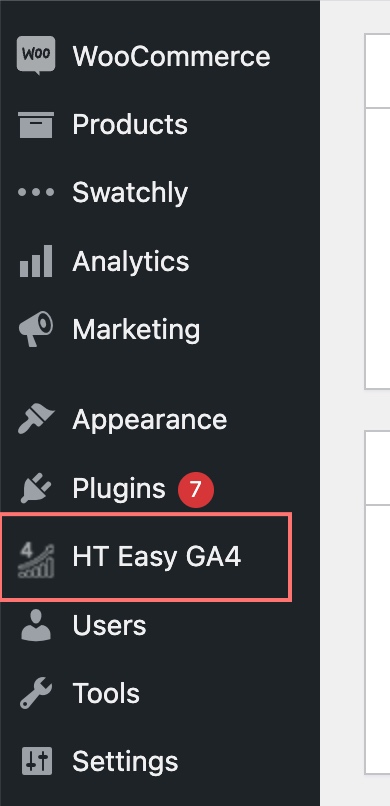
After activate the “HT Easy Ga4” plugin you will get a new menu called “HT Easy Ga4”. Click on this menu to go to the settings page and configure the plugin settings.
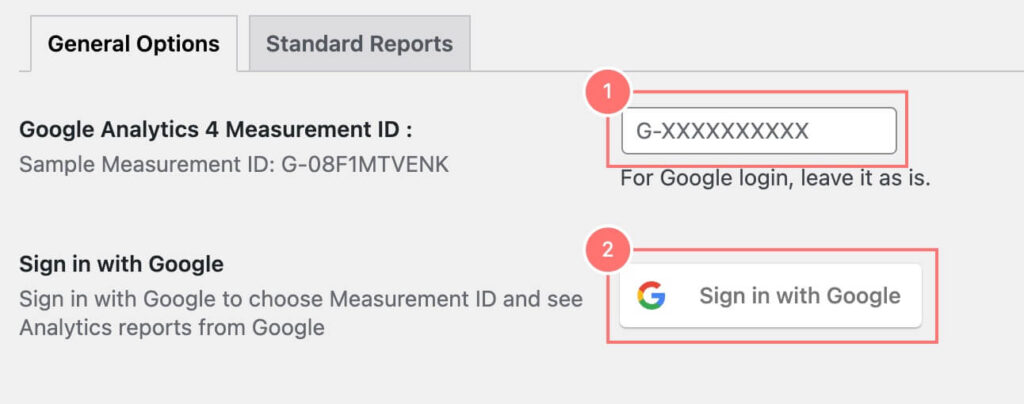
1. You can directly place your Measurement ID here. This will automatically add the gtag (tracking) script to your site’s header and start tracking your site. However, to use all of the plugin’s features, we recommend that you Sign in with Google and configure the Measurement ID. This will allow you to see and choose any of the Measurement IDs in your Analytics account without having to go to the Google Analytics website, and it will also give you access to the most useful Reports feature.
2. Click on this button to sign in with Google. This will open a new window where you can sign in to your Google account using your username and password. If you are already logged in, you will be able to select the account that you are currently using.
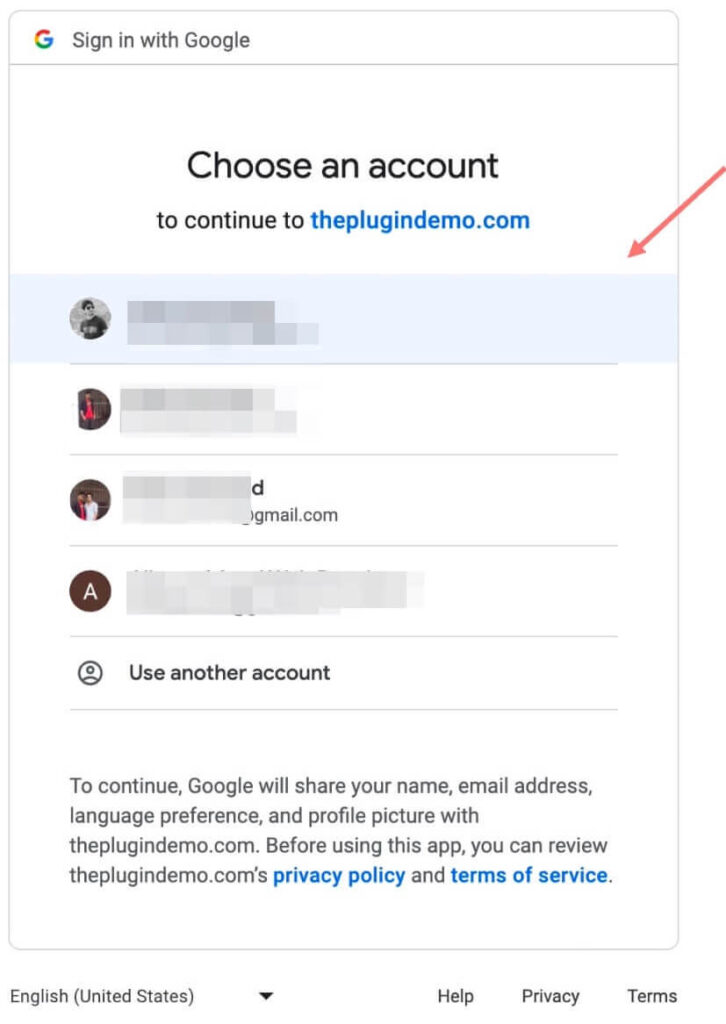
Select the account that is associated with your Google Analytics.
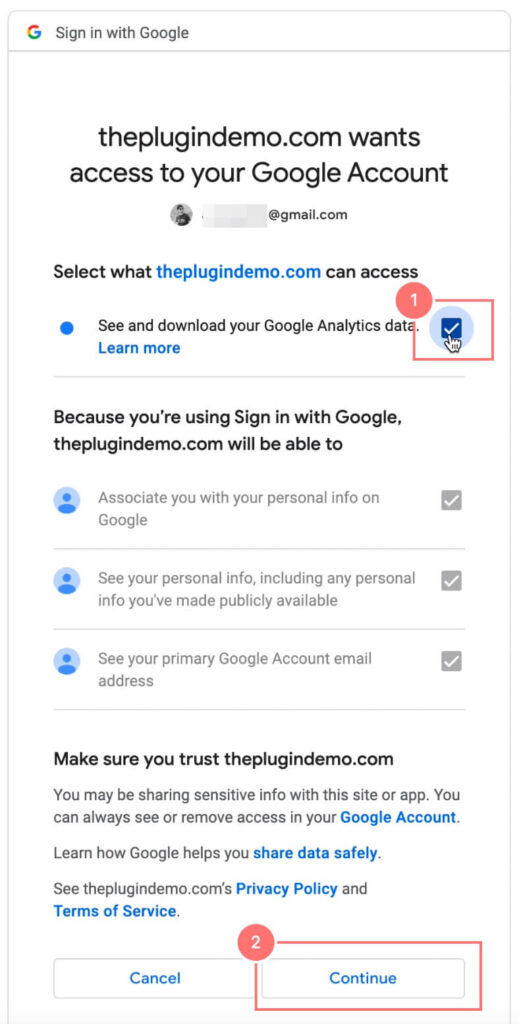
- Check the box to allow the plugin to connect with Analytics.
- Click on the Continue button after granting access.
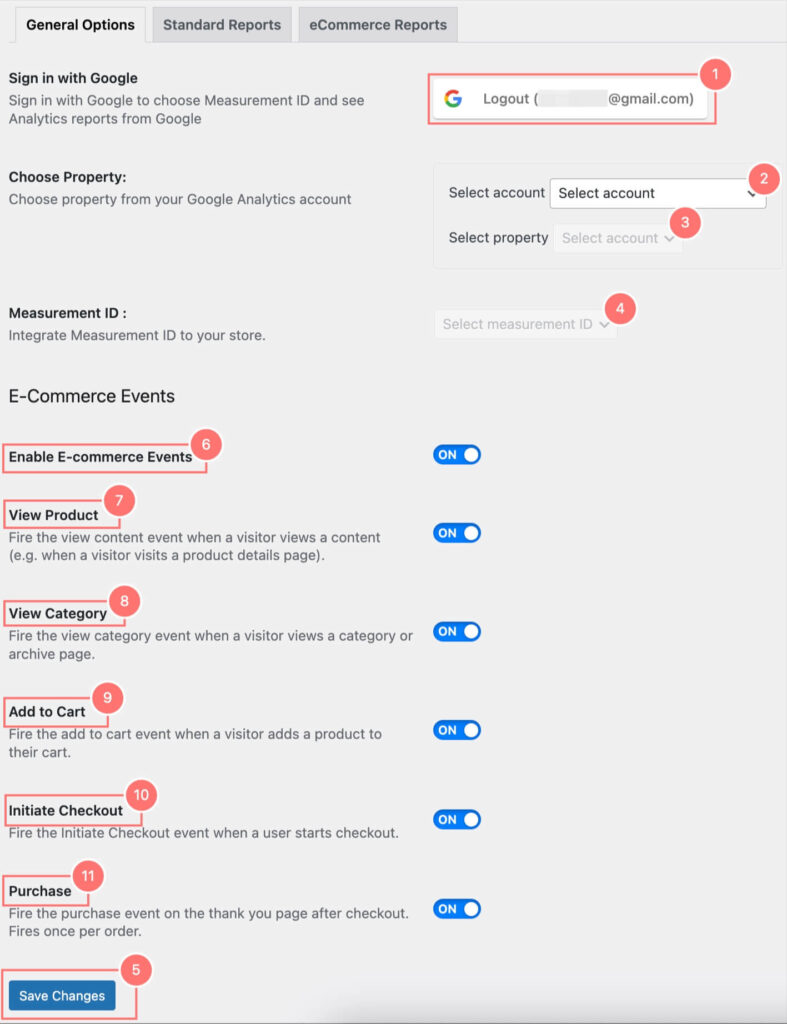
1. Once the plugin is connected to Google Analytics, you will see a “Logout” button with the email address you used to log in. You can disconnect from the Google Analytics API using this button.
2. Select the account that is associated with your Google Analytics. You will see the corresponding properties associated with this account.
3. Select the property from the dropdown list. Once you have selected a property, you will see a list of measurement IDs associated with that property.
4. Select the measurement id.
5. After configuring all the above options, finally, save it. The plugin will now add a script to your site’s header to track your website’s visitors. You do not need to use any other third-party plugins or add custom code snippets to your site to add the tracking code. If you have added tracking code to your site manually or using any third-party plugin, you can remove that code.
6. Enable E-Commerce Events (Pro): E-Commerce Events are used to track user behavior on e-commerce websites. Enable this event to start E-Commerce tracking. For example, you can track how many times users visit the checkout page and how many times visitors make purchases.
Note: To enable E-Commerce Events, you need to have the Pro version of the “HT Easy Ga4” and “WooCommerce” plugins activated.
7. View Product: This event is triggered when a user views a product page. This can be used to track which products are most popular and to see how users interact with your products.
8. View Category: This event is triggered when a user views a category page. This can be used to track which categories are most popular and to see how users navigate your site.
9. Add to Cart: This event is triggered when a user adds a product to their cart. This can be used to track when customers add items to their shopping carts, allowing you to analyze their purchase intent. Optimize your product offerings, pricing, and promotions to increase conversions and maximize revenue.
10. Initiate Checkout: This event is triggered when a user starts the checkout process. This can be used to track how many users start the checkout process and to see how many users abandon their carts. Identify any barriers or friction points and implement improvements to enhance the overall purchase experience.
11.Purchase: This event is triggered when a user completes a purchase. This can be used to track sales, revenue, and other key metrics.


